Table of Contents
GridWay + GoogleMaps web interface
This project is a third-party extension that you can install to offer a GridWay resources and activity web monitor.
Although it is a GridWay monitor, you can test it as a stand-alone application without any GridWay instance, because it comes with some demonstration files.
About
It has been developed by Carlos Martín Sánchez (carlos.martin.sanchez ~ gmail.com) as a Google Summer of Code 2009 project within The Globus Alliance organization, mentored by the dsa-research.org group member Dr. Alejandro Lorca.
Press coverage
This project was present at the EGEE'09 conference. You can download the tutorial slides here, and the conference ones here.
Features
Mainly, this web application is a graphical interface for the GridWay commands gwhost, gwps, gwuser, gwacct and gwhistory.
You can retrieve all the information provided by these GridWay commands and visualize it in your web browser, but it also provides some interesting features for both GridWay users and administrators that are not available through the command line interface.
The following images will guide you through the main features of this project, but you can should download it and try it for yourself!
Hosts
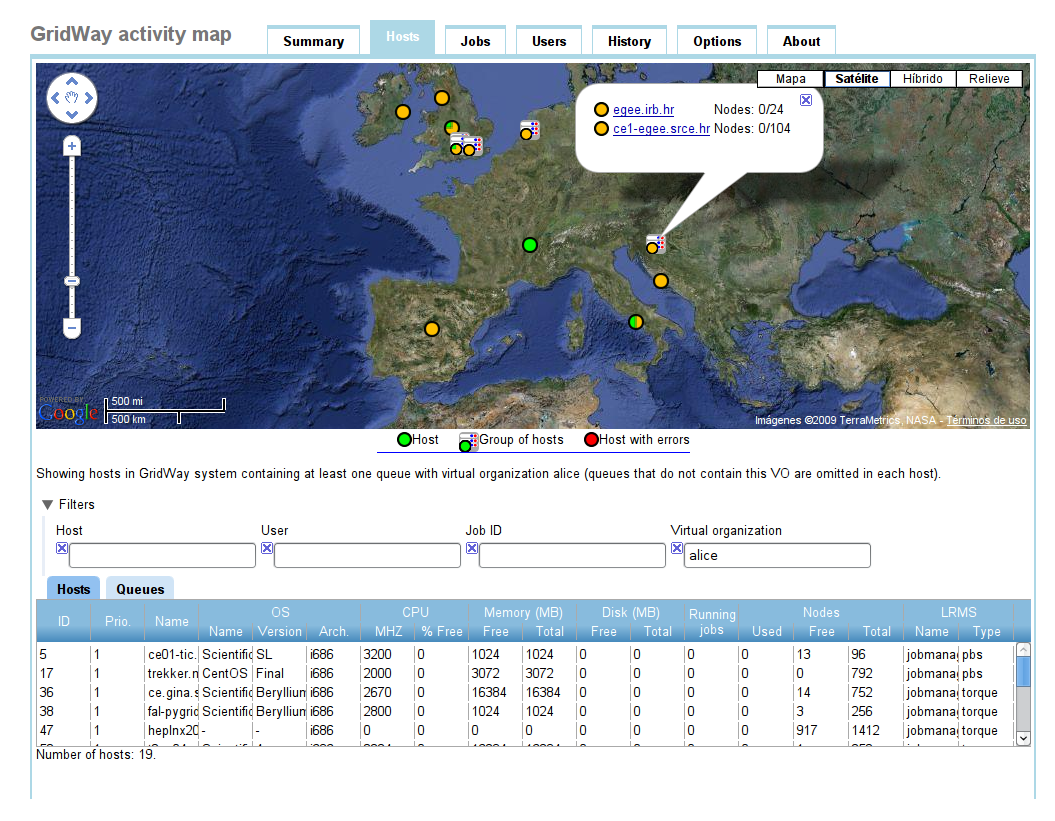
The main contribution of this project is the geographical representation of the retrieved data. Thanks to this intuitive representation, you can understand easily what is the state of your grid. As you can see, each host has a different icon depending on its availability.
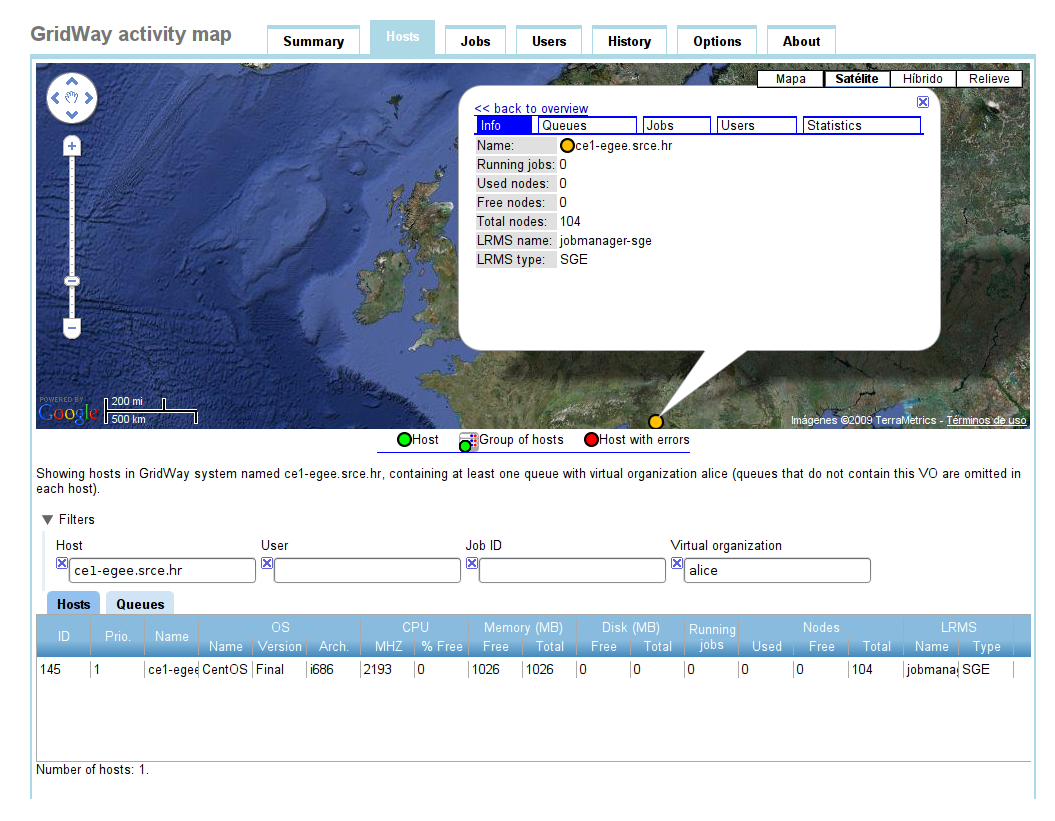
In this “Hosts” tab, you have the complete state of the grid at a glance, but you can also click on an icon (or an entry in the bottom table) to see the information related to each host. Here is an example of this:
One of those useful features that this project offers is the possibility to filter the data. For example, as a user you may want to know in what hosts do you have jobs executing at this moment. In the “Hosts” tab, you can filter the hosts that are shown.
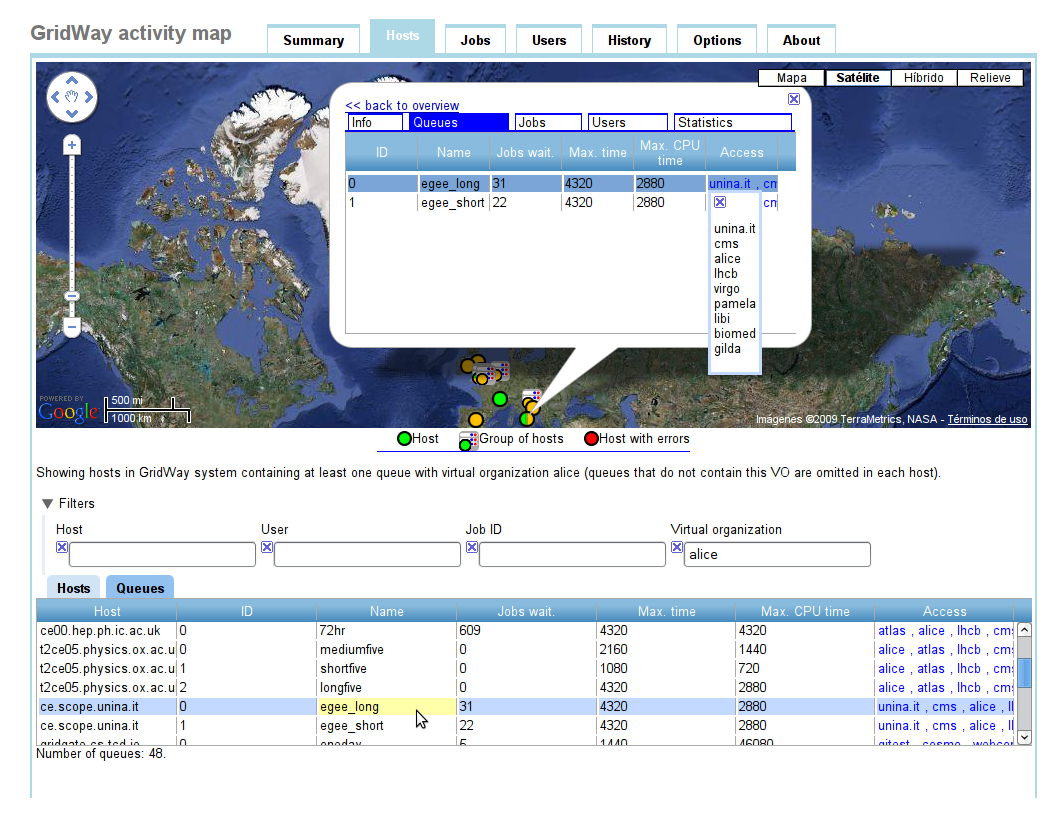
Other interesting features in the “Hosts” tab is the queues view. Queues are also filtered, so you can find out what queues have a certain VO.
Jobs
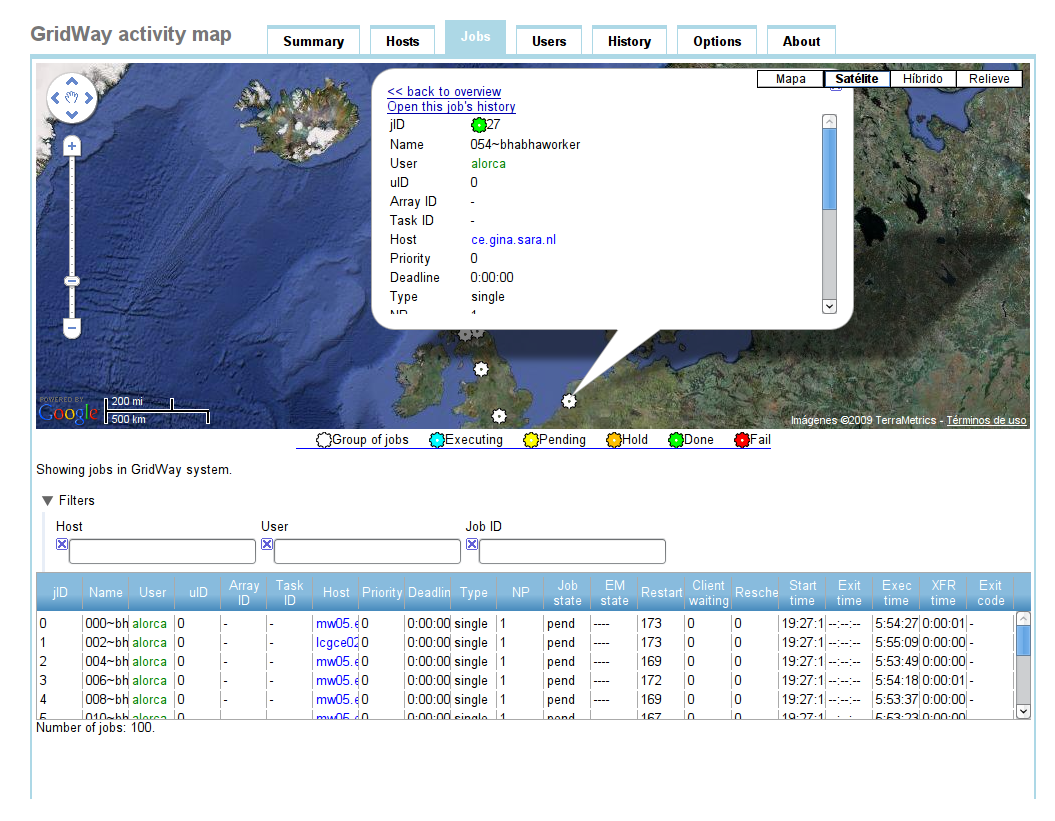
Selecting the “Jobs” tab in the menu at the top you will monitor the state of the jobs, in a similar way as you would do using the gwps command.
Here you can also use the filters to make easier to follow the status of the jobs you are interested in, just watching the map. You can determine if a job has a problem -because it may be moving from one host to another constantly-, monitor if a job has finished, etc.
As in the “Hosts” tab, you can see complete information for each job clicking on its icon, or its entry in the table at the bottom of the page.
Users
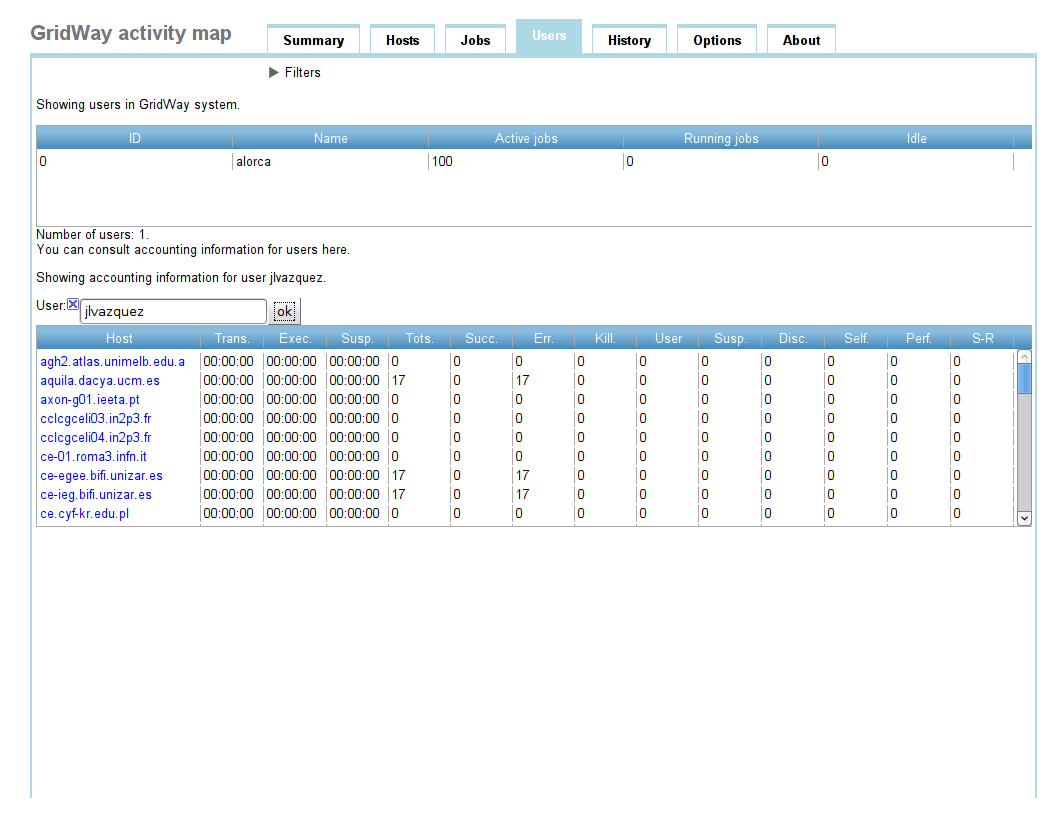
The “Users” tab is where you can see the gwuser command, and the accounting information for GridWay users (gwacct -u).
History
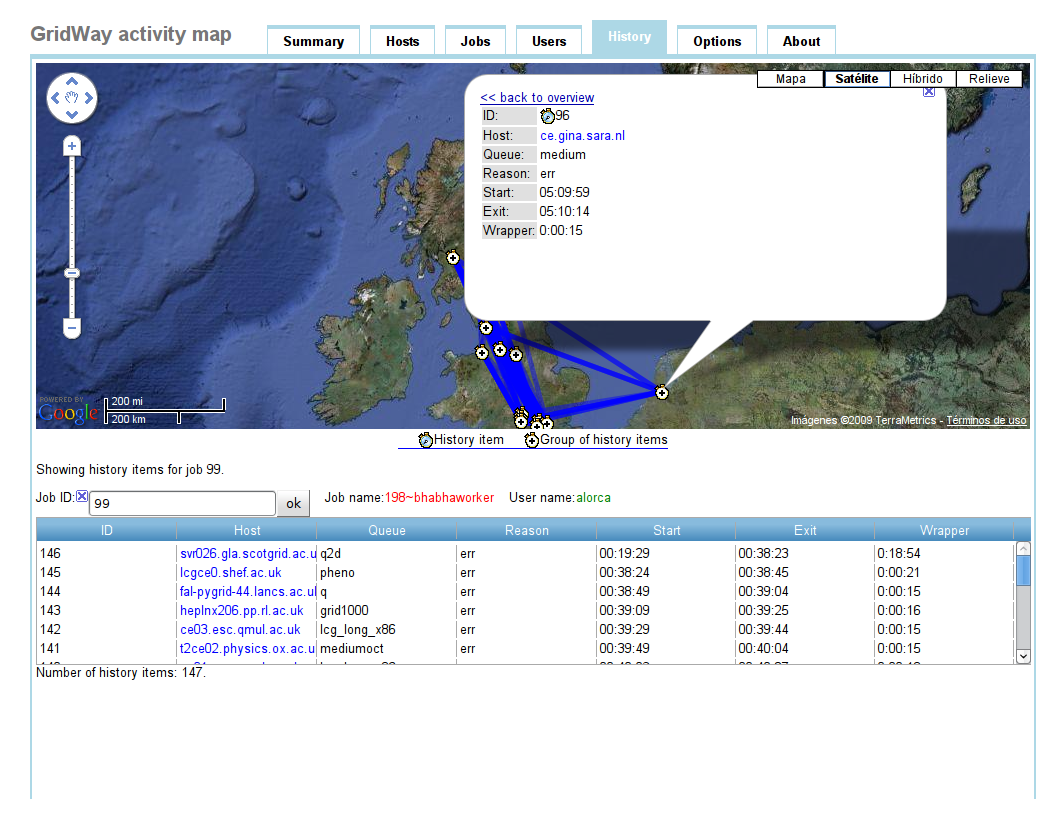
The gwhistory command is greatly improved when it is represented geographically.
Compared to the command line interface, this map shows a quick overview of the job's activity. As usual, you can inspect any history item clicking on its icon or clicking on its bottom table entry.
Download
The downloads section is located at http://dev.gridway.org/projects/gridway-gmaps/files
You can download the latest version here, or using the command:
wget http://dev.gridway.org/attachments/download/31/gwmap.war
Installation
If you have downloaded this application, probably you already have a GridWay instance running. But it is not entirely necessary, because this web application comes with sample GridWay files so you can use it as a stand-alone web application to test your web server, or find out if it is suitable for your needs.
To use the GridWay activity map web application, you need a GNU/Linux server machine with a servlet container installed.
This document covers the installation using Ubuntu and the tomcat6 servlet container.
Deploy the war file
Once you have downloaded the gwmap.war file, it must be deployed into tomcat. This process is explained in the tomcat documentation:
http://tomcat.apache.org/tomcat-6.0-doc/deployer-howto.html
The easiest way to accomplish this is using the tomcat manager, installed by default:
Grant permissions
In tomcat, permissions are located by default in
/var/lib/tomcat6/conf/policy.d/04webapps.policy
By adding the following line, you will grant all security permissions to all your servlets. This is a temporary configuration, and you should use it only for testing purposes. Please come back in a few days to read an updated version of this guide.
permission java.security.AllPermission;
Reset the tomcat servlet container:
/etc/init.d/tomcat6 restart
Test your server
At this point you should be able to test the web application in your web browser at this address:
http://<your.server>:<your.tomcat.port>/gwmap/
Setup variables
Go to the new gwmap/ directory created in your tomcat webapp directory /var/lib/tomcat6/webapps.
In Ubuntu by default the path will be
/var/lib/tomcat6/webapps/gwmap/
In the config/ directory you will find the following files:
demo
If this file contains “1”, the servlet will read the sample files located at gwmap/demooutputs, and the remote ssh commands will not be invoked. Set it to “0” for normal use.
gmapskey
Your server's google maps api key. You need to sing up for one here:
log
You can activate the extended server log writing “1” in this file.
The output is written in the servlet's container log.
refresh-default
When a user accesses the application, this will be the default delay for refreshing the GridWay data, in seconds.
refresh-min
When the server executes the GridWay commands (gwhost, gwps, gwuser), those outputs are served to the clients for this amount of time, before executing them again.
In seconds.
ssh-host
Host to be monitored with a GridWay instance running.
ssh-user
User capable of executing GridWay commands in the ssh-host machine
Please note: demo, log, ssh-user and ssh-host are static options: they are read at start, and you have to reload the servlet (using the Tomcat Web Application Manager) in order to load changes.
The other configuration files reflect changes dynamically, users will notice the changes after reloading their browsers.
Prepare a user in the GridWay machine
You need to create a user in the machine running the GridWay instance you will monitor.
We will call this user gridway-user in this document, but of course any name is fine.
This new user should be able to use the GridWay commands. Please refer to the GridWay documentation to find out how to accomplish that.
Make the tomcat6 user capable of using ssh connections
Back in the server machine, we need the servlet to be able to invoke GridWay commands over ssh, without asking for a password.
The servlets run as the tomcat6 user, so first we need to select a password for tomcat6.
Set a password:
sudo passwd tomcat6
The tomcat6 user takes its home directory as /usr/share/tomcat6 , but its owner is root.
We need to create the following directory:
sudo mkdir /usr/share/tomcat6/.ssh
And grant permissions to it:
sudo chown tomcat6 /usr/share/tomcat6/.ssh
Now we can run the following command, as user tomcat6:
sudo -u tomcat6 ssh-keygen -t dsaFile id_dsa and id_dsa.pub will be created inside /usr/share/tomcat6/.ssh
Copy the id_dsa.pub to the gridway machine's .ssh directory:
sudo -u tomcat6 ssh-copy-id -i /usr/share/tomcat6/.ssh/id_dsa.pub gridway-user@gridway-machine
Now, the tomcat6 user can log-in to the GridWay machine as gridway-user without password.
Development
Follow this link to find out more about the development, download the source code, fill a bug report, etc. Development
